Studio Cat

The Art Of Virtual Litter

  • Home
  • Photo Agencies
  • Promo Code
  • About Us
  • Contact Us

How to Add Alt Text to Images in WordPress: A Step-by-Step Guide

November 18, 2024 By Theresa Burke Leave a Comment

I’ll often see website owners overlook one crucial aspect of their WordPress images – the alt text attribute. It’s a simple yet powerful element that serves two important purposes: making your content accessible to visually impaired users and boosting your site’s SEO performance.

If you’ve noticed some images on your WordPress site lacking alt text, you’re not alone. Whether images were uploaded without alt attributes or your theme doesn’t automatically include them, it’s a common issue that needs attention. But don’t worry – adding alt text to your WordPress images is a straightforward process that anyone can master with the right guidance.

Key Takeaways

  • Alt text is essential for WordPress images, serving both accessibility needs for visually impaired users and SEO optimization purposes
  • Three main methods exist for adding alt text in WordPress: through the Media Library, Block Editor, or HTML modification
  • Effective alt text should be concise (under 125 characters), descriptive, and naturally include relevant keywords without stuffing
  • Best practices include using specific product names, avoiding phrases like “image of,” and focusing on describing the image’s core purpose
  • Regular verification of alt text implementation using browser inspection tools or SEO audit software helps maintain accessibility standards

Understanding Image Alt Text

Alt text provides descriptive content for images on web pages, making them accessible to visually impaired users and search engines. Its implementation creates a more inclusive digital experience while enhancing search visibility.

What Is Alt Text and Why It Matters

Alt text functions as an HTML attribute that appears when images fail to load or when screen readers process web content. Here’s what makes alt text essential:

  • Acts as a text replacement for images, providing context to users who can’t view them
  • Creates a descriptive label that screen readers read aloud to visually impaired users
  • Displays when images fail to load due to connectivity issues
  • Differentiates from captions by focusing on describing the image rather than providing additional context

SEO and Accessibility Benefits

Alt text delivers dual benefits for website optimization and user accessibility:

  • Enables screen readers to convey image content to visually impaired users
  • Maintains content meaning when images don’t load
  • Provides context for users with limited bandwidth or disabled images
  • Helps search engines understand image content
  • Improves image visibility in Google Images search results
  • Contributes to overall page ranking when images relate to search queries
Alt Text Impact Performance Metrics
Page Load Effect Minimal data overhead
Backup Content Instant display if images fail
Image Search Visibility Enhanced ranking potential

Adding Alt Text in WordPress

WordPress offers multiple methods to add alt text to images, ensuring your content remains accessible and SEO-friendly. Here are three straightforward approaches to add alt text in WordPress.

Using the Media Library

The Media Library provides a centralized location to manage alt text for all uploaded images. Navigate to Media Library from the WordPress dashboard, select an image, locate the Alt Text field in the right sidebar. Enter descriptive text that explains the image content or purpose. This method updates alt text across all instances where the image appears on your site.

Using the Block Editor

The Block Editor enables real-time alt text addition while creating or editing posts. Select the image block, click on the image, find the Alt text (alternative text) field in the block settings panel on the right. Type your descriptive text. The Block Editor displays a helpful reminder if alt text is missing, ensuring consistent accessibility practices.

Modifying Alt Text Through HTML

HTML modification offers precise control over alt text implementation. Switch to the Code Editor view in your post or page, locate the image HTML tag (<img>), find the alt attribute (alt=""). Insert your descriptive text between the quotation marks. The HTML format appears as: <img src="image-url.jpg" alt="your descriptive text here">. This method proves useful when specific formatting or special characters are needed.

Method Best Used For Access Point
Media Library Bulk updates Dashboard > Media
Block Editor Individual posts Post/Page editor
HTML Custom formatting Code editor view

Best Practices for Writing Alt Text

Alt text descriptions require specific attention to detail to ensure both accessibility and SEO effectiveness. Let’s explore the essential guidelines for creating effective alt text.

Creating Descriptive Text

  • Write concise descriptions under 125 characters for optimal screen reader compatibility
  • Include specific product names along with product IDs for e-commerce images
  • Focus on describing the image’s core purpose or main action
  • Add relevant keywords naturally within the description when appropriate
  • Rename image files with descriptive names that match the alt text context
  • Include semantic context that explains the image’s role on the page
Image Type Poor Alt Text Effective Alt Text
Service Dog “dog” “Service dog guiding person on sidewalk”
Product “burger” “Classic cheeseburger with lettuce on flame-grilled background”
Logo “company logo” “TechCorp blue and white corporate logo”
  • Using phrases like “image of” or “picture of” as screen readers automatically identify file types
  • Stuffing keywords unnaturally into alt text descriptions
  • Leaving alt text fields empty on important images
  • Creating overly lengthy descriptions that exceed 125 characters
  • Repeating information already present in image captions
  • Using generic file names like “IMG_001” instead of descriptive names
  • Including decorative text formatting or special characters
Alt Text Issue Impact
Keyword Stuffing Negative SEO ranking
Missing Alt Text Reduced accessibility
Generic Descriptions Poor user experience
Excessive Length Screen reader limitations

Verifying Alt Text Implementation

Verifying alt text implementation in WordPress ensures proper accessibility and SEO optimization. Here’s how to add alt text to images in WordPress to check and troubleshoot alt text on your WordPress site.

Tools to Check Alt Text

Two effective methods exist for verifying alt text implementation:

  1. Browser Inspection Method:
  • Right-click on any webpage
  • Select “View Page Source”
  • Press Ctrl+F (Windows) or Cmd+F (Mac)
  • Type “alt=” to locate all alt text instances
  1. SEO Tool Analysis:
  • Use specialized SEO audit tools
  • Run a site crawl to identify missing alt text
  • Generate reports highlighting alt text issues
  • Export alt text data for bulk review

Troubleshooting Missing Alt Tags

Common reasons for missing alt tags include:

  1. Upload Issues:
  • Images uploaded without alt text
  • Bulk uploads skipping alt text fields
  • Media library transfer errors
  1. Technical Solutions:
  • Review Media Library settings
  • Check theme compatibility
  • Verify plugin configurations
  • Update outdated image entries
  1. Bulk Fixes:
  • Access Media Library
  • Select multiple images
  • Edit alt text in batch
  • Save changes globally
  1. Prevention Steps:
  • Enable alt text reminders
  • Create image upload protocols
  • Use alt text generation plugins
  • Implement regular alt text audits

Note: Missing alt text affects both accessibility compliance and search engine performance, making regular verification essential.

Conclusion

Adding alt text to your WordPress images isn’t just about following web standards – it’s about making your content accessible to everyone while boosting your SEO efforts. I’ve found that taking a few extra seconds to add descriptive alt text can make a huge difference in how both users and search engines interact with my content.

Whether you choose to work through the Media Library block editor or dive into the HTML the most important thing is to make it a consistent part of your workflow. I encourage you to start implementing these practices today. Your visitors and your search rankings will thank you for it.


 

Filed Under: WP Plugin

What’s the Best WordPress Image Plugin for Creative Professionals?

June 27, 2017 By Theresa Burke Leave a Comment

Photo galleries are very versatile and useful for wordpress websites. They aren’t just for photographers. If you have high quality and engaging photo demands, you can get a wordpress image plugin and display images in your website to attract visitors, convert to customers, and drive more traffic. The challenge comes in finding the best plugin for your project.

Now, there are a number of choices in the market. But, there’s one that caught our eye – PixelRockstar. The wordpress image plugin is developed by stock photo experts and features over 4 million high quality images. You don’t have to worry about legal and technical issues related to the use of the images, too. All photos come with a Digital License, which is specially designed for digital use.

Here are 3 main reasons why PixelRockstar is the best wordpress image plugin for creative professionals:

  • Easy to use. The plugin delivers stock photos and illustrations quick and easy. You can stop wasting valuable time, and start searching and adding images to your website and social media in just a few clicks.
  • Best prices. Starting at $0.57 each, you can download the images you need without taking too much money from your pocket. Three image packages are offered, so you can choose whichever suits you creative needs and budget.
  •  Safe to use. With PixelRockstar, you don’t have to worry about the legal risks of using free imagery from the internet. The wordpress image plugin offers a Digital License with its images and removes all common limitations that drive online publishers away from tradition sources.

Photos tend to be heavy, so be careful when adding them to your website. PixelRockstar, on the hand, does not slow down your website. Images are optimized with SEO-friendly options and posted automatically, saving you a lot of time to do the things you love.


Filed Under: WP Plugin Tagged With: best image plugin, image plugin, wordpress image, wordpress plugin

Buy Stock Photography to Reap All these Benefits

October 18, 2016 By Theresa Burke Leave a Comment

Many people ask why they should buy stock photography when they can get it free. You should not be blinded by the savings you get with free photos. While they do not cut a single cent from your budget, they can be very limiting. Not to mention the damages you will endure when you get caught by the copyright police.

buy-stock-photography

With stock photos, there are a number of benefits that you will certainly enjoy. These includes:

  • Vast libraries. There are only a number of free photos available for commercial or editorial use in the Internet. This limits your choices, forcing you to settle on images that may not be relevant to your brand or story. On the other hand, you can buy stock photography with literally hundreds of millions of choices. Getty Images have over 200 million stock content. Adobe has 40 million. Shutterstock has over 80 million. While some of these images are similar, your choices are endless.
  • Perpetual usage rights. When you buy stock photography, you can use it in any project for as long as you like. There are restrictions, but only a few. You can use it multiple times in both commercial and editorial purposes. Of course, you must adhere to the terms and conditions imposed by the stock photo agency you buy the images from.
  • Legal rights. Unlike free photos, you can use stock images legally. When you buy stock photography, you are protecting yourself from future legal issues. For instance, a stock site or image owner accuses you of intellectual property theft. You can show your receipt of purchase or contract, indicating that you have the right to use the image.
  • Great savings. It may not be as great as the savings you get from free photos, but it will pay off in the long run. Free photos have a high risk of copyright violations, which can be very damaging to your reputation and your bank account. So, a few bucks of savings can results to thousands of loss. When you buy stock photography, you can literally enjoy loads of savings without worrying about issues down the road.
  • Edits and retouch. Free photos do not allow edits and retouches. When you buy stock photography, you can edit and retouch the images as you please to suit your creative needs, enhance your message and fit the theme or style of your brand.

When it comes to using images to your creative projects, nothing is more appropriate than buying stock photography. You get millions of choices, perpetual usage rights, great savings, and a lot of editing opportunities. These benefits are not available with free photos. That’s why we always recommend signing up to a stock site and downloading your images from them.

Filed Under: Stock Photography Tagged With: buy stock photography, Stock Photography

Your Guide to Buying Cheap Stock Footage

July 18, 2016 By Theresa Burke Leave a Comment

Cheap stock footage has been a convenient resource for filmmakers around the world. Its immediate download ability and cost-saving advantages have helped numerous creative professionals complete their projects. It is commonly seen in movies, television shows, and documentaries. It adds a whole new perspective to filmmaking. If you have not explored the world of cheap stock footage, you should consider these tips in buying one.

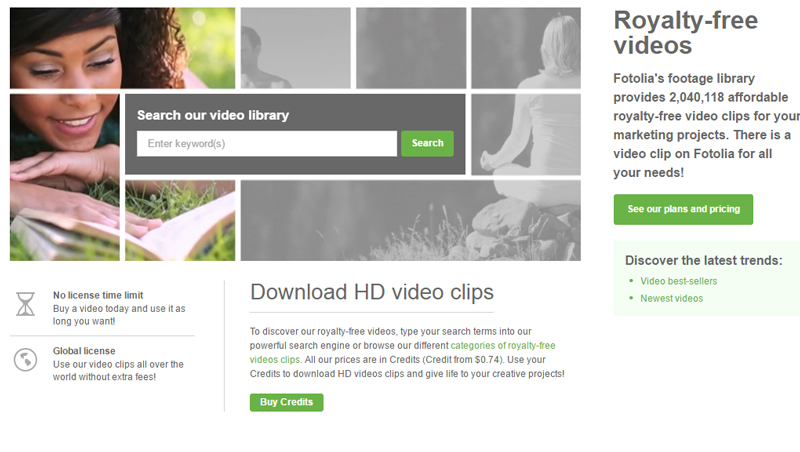
fotolia-videos

  • Know your budget. This is the first thing you should determine before you buy a cheap stock footage. Prices of footage vary based on type of license and quality. They can range from one to a hundred dollars. To make sure you will not incur any additional costs along the road, read the licensing agreement and understand what is stipulated there.
  • Be consistent in quality. Make sure that the cheap stock footage you will purchase matches the quality of your film. If your video only requires a standard definition, you do not need to spend more money on high definition stock footage. The same applies if your video is HD; you do not need to buy a 4K footage. Preview all cheap stock footage before you purchase them to make sure they fit the format specifications of your project.
  • Be wary of modifications. Not all cheap stock footage allows modifications on the original work. Some stock sites provide restrictions that will cause you great trouble when violated. This is most common in footage for editorial use only. Thus, you need to carefully read and follow the rules on the use of footage to avoid facing legal damages.
  • You have a legal guarantee. Most cheap stock footage sites provide a free legal guarantee when you purchase the asset from them. They will protect you from any legal action that may arise with your purchased file. Check this with your selected stock footage source.
  • Make it work for you. Although you will not use cheap stock footage on all your video projects, it is best to know that it is out there waiting to be explored. As long as you know where to get them and how much they are going to cost you, they will prove beneficial to your cause. If you do not have enough time and resources to conduct another shooting, know that you can purchase a stock footage.

Cheap stock footage makes video production easier, so go ahead and incorporate it to your projects. Do not feel bad that someone is using the same footage in their projects because anything that will enhance your work will leave an impression. Whether it is stock footage or your own creative work, what matters most is the result. Do not be afraid to use the quality cheap stock footage in the market.

Filed Under: Cheap Stock Footage Tagged With: Cheap Stock Footage, Cheap Stock Video, Cheap Stock videos

10 Things to Remember When Choosing Adobe Stock Photos

November 10, 2015 By Theresa Burke Leave a Comment

adobe-stock-logo (1)Using Adobe Stock as your primary image source has its benefits, especially if you are using Photoshop and other Creative Cloud applications as your primary photo-editing app. For one, CC users enjoy 40% discount when added to their subscriptions. They also save time and effort from downloading the Adobe Stock photos to their computer and reworking upon buying the images. This means that the stock photo agency is integrated with their CC desktop software.


Perhaps, the greatest benefit of using stock photo agencies, like Adobe Stock (check this review here), is the savings. You can forget about the expensive and time-consuming photoshoots as Adobe Stock becomes a more convenient and less expensive alternative. And with a Creative Cloud subscription, you do not have to worry about seeing the same images among your competitors. You can use your photo-editing software to make them appear custom – as long as you have the right license.

Adobe Stock Plans and Pricing

To help you find unique images, here are some things you need to remember in choosing Adobe Stock photos that do not seem stock-like:

  1. Before you start looking for stock photos, you should determine the goals of your project first. This will save you from the hassle of finding the wrong images.
  2. When making decisions, listen to your visceral voice. Especially if you have trouble choosing between similar images, choose the one that evoke emotions, thoughts and moments.
  3. Find an image the compliments your message. You do not want to send the wrong impressions to your readers, so make sure your image supports your message.
  4. If you want to include people in your images, choose the natural ones. Stay away from Adobe Stock photos that look over-posed.
  5. If you need an image for print, make sure to get images with the size and resolution appropriate for print.
  6. Choose a subject that your readers can easily relate to. They work better in capturing your readers’ attention and encouraging them to take action.
  7. Make your that your chosen images are proportionate to your design. This promotes a more professional feel and appearance.
  8. Update your images as time changes. Unless your subject is retro, make sure that your images are up-to-date.
  9. If you need an image for a presentation, choose one that has enough space for text. Images with plenty of space are suitable as background.
  10. Avoid dull and muted images that can easily fade into the background.

adobe stock free trial

It can be time-consuming and expensive to conduct your own photoshoot. Fortunately, Adobe Stock has millions of high quality, royalty-free images in their collection. You can surely find one image that suits your creative project. Whether you are running a blog, website, or campaign, you can never go wrong with Adobe Stock photos. Just make sure you get the necessary license to avoid copyright violations.

Filed Under: Adobe Stock Tagged With: adobe stock, adobe stock plans, adobe stock pricing, adobe stock subscription

  • « Previous Page
  • 1
  • 2
  • 3
  • Next Page »
  • Free Stock Photos for Social Media Content Creators: A Practical Guide
  • Family Photo Session Guide: Tips for Capturing Perfect Moments & Memories
  • How to Buy Cheap Stock Footage: 10 Money-Saving Tips for Content Creators
  • iStock Promo Code 2024: Get 25% Off Photos & Videos [Latest Discount Codes]
  • How to Get Shutterstock Coupons: Save 50% on Stock Photos & Images in 2024

Shutterstock HQ Images

Copyright © 2026 · Studiocat.net · All Rights Reserved